Monday, July 18, 2011

Quadruple Chocolate Brownies

After three glorious weeks of eating dessert four times (or more) a day and bread with every meal, I thought I would never want to see sugar or carbs again, but boy was I wrong. Just the food alone in Europe is an amazing experience- fish and chips in London, baguettes and crepes in Paris, tapas in Spain, pizza and gelato in Italy- you really can't go wrong. But when I got home I was craving nothing but fruit and oatmeal, and I thought it would be easy to slide right back into my old food habits. Yet it's been a little over a week and now all I can think about is having just one more croissant, or nutella crepe, or more gelato: pistachio, lemon, banana, chocolate...really, any flavor will do.


But rather than pigging out on store bought ice cream or pastries that can't even compare to the real thing, I thought I would attempt to at least make something a little bit healthy. So without a recipe in hand, I marched right into the kitchen and raided the cabinets for ingredients, surprisingly finding a good amount to work with.

I pretty much just poured a bunch of different things into a mixing bowl and scribbled down measurements, coming up with it all as I went. I'll probably come back to this a little later to play around with the recipe some more, but I have to admit, they are tasty. I tried to stick with vegan, gluten-free, and sugar-free ingredients just for funsies, but go ahead and use real flour, milk, and chocolate chips, if you want.

And ta-da! My original creation- no recipe, just a little bit of luck.
Quadruple Chocolate Brownies (Vegan, Gluten-free, and Sugar-free)


Ingredients:
  • 1 1/4 cup almond meal
  • 1 1/4 cup rice flour
  • 1/4 cup sugar-free Jell-O chocolate pudding mix
  • 1/2 teaspoon cocoa
  • 1/2 teaspoon salt
  • 1/2 teaspoon baking powder
  • 1/2 cup canola oil
  • 1 Tablespoon sugar-free chocolate syrup
  • 1/2 cup agave nectar
  • 1/2 cup chocolate soy milk
  • 1 cup carob chips
Directions:
  1. In a large bowl, combine almond meal, rice flour, salt, baking powder, pudding mix, and cocoa.
  2. In an electric mixing bowl, mix canola oil, agave nectar, chocolate syrup, and soy milk.
  3. Slowly add the dry ingredients to the wet ingredients. Stir in carob chips.
  4. Pour mixture into an ungreased pan and bake (I baked them for 12 minutes and they were still pretty wet. If you want crispier brownies, I would suggest baking them longer. But I just put them in the fridge and they hardened up after a couple hours).

Sunday, April 10, 2011

Easy Gluten-Free Pizza

It's late for a school night but I'm staying up watching Extreme Couponing and Khloe and Lamar and wearing my slanket (off-brand snuggie) so I can get this post up (oh, the sacrifices!) because I am so excited to share this yummy healthy alternative to my favorite food...pizza!

While trying to find a good cookie recipe to use garbanzo bean flour in (not an easy task!), I found a lot of recipes for pizza dough, and I've had it stuck in my head ever since. So tonight I found a flatbread recipe that looked delicious and really simple...and guess what! I was right :)

This flatbread, called fiana, is a popular appetizer in South America. The recipe is from About.com

I didn't use a recipe for the pizza topping, I just used what we had. This is the part where you can get creative! For my first try at this pizza crust, I wanted to keep it simple with tomatoes and cheese, so the topping wouldn't overpower the crust.

The recipe used a 12 inch pan, which I didn't have, so I used a 9 inch pan. It made the crust really thick, like deep dish pizza. When using a smaller pan, I learned to use less olive oil- I ended up having to pour some of it out of the pan once the batter was partially baked.

Overall, this was REALLY good pizza. I want to play around with it though, maybe trying different pizza toppings and doing a thinner crust. I also want to try a vegan pizza. Besides the parmesan cheese, the crust is already vegan!

GARBANZO BEAN PIZZA (it's worth trying!)

INGREDIENTS

flatbread
  • 2 1/2 cup garbanzo bean flour
  • 1 teaspoon salt
  • 6-7 tablespoons olive oil
  •  2 tablespoons parmesan cheese
  • about 1 tablespoon pepper
  • 2-2 1/2 cups water
tomato topping (Note: these measurements are not exact, I just eyeballed it)
  • 1 cup cherry tomatoes, halved
  • 1/4 cup mozzarella cheese
  • 1 tablespoon crushed garlic
DIRECTIONS
  • Preheat oven to 450 degrees.
  • In large bowl, whisk together flour, salt, 3 tbs olive oil, cheese, and pepper
  • Whisk in 1 3/4 cups of water until well mixed. Set aside for half an hour to let the flour absorb some of the water.
  • Place 3-4 tablespoons of olive oil into pan, depending on pan size. (Note: for a thick pizza crust, use a 9 inch pan or smaller. For a thin pizza crust, use 12 inch or bigger. The bigger the pan, the more olive oil you need-you just need enough to cover the bottom.)
  • Stir 1/4 -3/4 cups of water into batter until the batter is just thin enough to pour. Remove the pizza pan from oven and pour batter into pan.
  • Bake until golden and crispy. (There isn't an exact baking time-you just need to watch it closely. Thin crust will take about 10 min, but thick crust can take about 40 min)
  • Check the pizza frequently. When it is no longer soupy (but not quite baked all the way through) take it out of the oven and spread pizza topping over the crust. Put it back in the oven until it is fully baked.  
  • Enjoy!

Sunday, April 3, 2011

The Best Chocolate Chip Cookies....EVER

It's true, they really are the best chocolate chip cookies ever. I know this because I brought them to school and everyone had the same reaction I did. That was 3 days ago and they are still being talked about. Seriously...they are amazing.

What makes them so great, you ask? Well first of all, they are just so photogenic, how could they be anything but yummy? It also is the fact that they are loaded with sugar and flour (sorry guys, but trust me they are sooooo worth it)

And it also probably has something to do with their secret ingredient....

(drum roll please...)...

OREOS!! Yes, it's true- Oreo stuffed chocolate chip cookies. I know, it's shocking.

IMPORTANT NOTE: this is not my recipe (although I would LOVE to say that I was the one who created the best chocolate chips ever :/ ). I found it on Picky Palate, and is an original recipe. All I did was add some almond flour to give it an extra something.

So I apologize for the fact that they are in no way healthy, but I think everyone should at least be aware that such amazing cookies exist. I share because I care. You're welcome.


OREO STUFFED CHOCOLATE CHIP COOKIES

INGREDIENTS
  • 2 sticks butter, softened
  • 3/4 cup brown sugar
  • 1 cup white sugar
  • 2 large eggs
  • 1 Tbs vanilla extract
  • 1/4 cup almond meal
  • 3 1/2 cups flour
  • 1 tsp salt
  • 1 tsp baking soda
  • 10 oz. semi-sweet chocolate chips
  • 1 pckg Oreo Double Stuf cookies
DIRECTIONS
  1. Preheat Oven to 350 F.
  2. In mixer, cream together butter and sugars. Add in eggs and vanilla.
  3. In separate bowl, mix flour, baking soda, salt, and almond meal. Slowly add to wet mixture.
  4. Stir in chocolate chips
  5. Using an ice cream scoop, hold oreo cookie in one hand and scoop cookie dough on top of cookie. Flip the oreo and cookie dough over, and put another scoop on top. Seal the edges so that the oreo is completely covered.
  6. Put cookies on greased baking sheet and bake for 15 minutes. (Makes 12-14 HUGE cookies).

Saturday, April 2, 2011

Sugar-Free, Gluten-Free Black Bean Brownies

Black beans in a brownie...whaaaat?! Although it may not sound too appetizing, don't be fooled by the name. These brownies are scrumptious! The black beans are undetectable, but they give the brownie some substance and packs them with protein...what's so bad about that? With the beans, you end up using less of all the other ingredients, so it's also a money saver. By using 3/4 cup black beans, you only need 1/3 cup flour (or in this case, a flour substitute to make them gluten-free). Not to mention, they are super easy to make!! All the ingredients are thrown into the blender and...ta-da! Yummy brownies!


Convinced to try them yet? 

....What about now? They look good, don't they?

When I first tasted it, I wasn't so sure. The recipe calls for a teaspoon of instant coffee, which you can definitely taste (not that that is a bad thing, but it was unexpected). I also decided to use carob chips, which are a vegan substitute for chocolate chips (for a description, I'll put them on my substitutions page). Before using them, MAKE SURE that you actually like carob...because they have an interesting taste. Although they are a substitute for chocolate, they don't really taste like chocolate- they have more of a nutty taste.

That being said, I took some brownies to school and they went over pretty well. Nobody seemed to complain about the coffee or carob!

I'm going to post the recipe, but I might come back and make some changes later. I'm going to work on this recipe this week, because I think I can make them even better! (not to undermine this recipe, it's DELICIOUS)

And now it is time for- Oh wait! Before giving you the recipe I also want to say that I got the idea from the food network (yes, I'm obsessed), and I did some research and this is actually a popular recipe. Who knows, you might have tried a black bean brownie before and just didn't know it because it was too damn good to know you were eating beans!

Ok, and NOW it is time for the recipe!!!

BLACK BEAN BROWNIES

INGREDIENTS
  • 3/4 Cup cooked black beans
  • 1/2 Cup vegetable or olive oil (I used olive- don't worry, you won't be able to taste it)
  • 2 eggs
  • 1/4 Cup unsweetened coca powder
  • 1/3 Cup agave nectar
  • 2 bananas
  • 1 tsp instant coffee or espresso
  • 1 tsp vanilla extract
  • 1 pckg sugar substitute (I used Truvia)
  • 1/2 Cup carob chips (or chocolate chips)
  • 1/3 Cup White Rice Flour (or brown rice flour-see substitutions)
  • 1/2 tsp baking powder
  • 1/2 tsp salt


DIRECTIONS
  1. Preheat oven to 350 degrees F.
  2. In a blender, puree beans and oil (ok, I know it looks kinda gross...but I promise you, it gets better).
  3. Add eggs, cocoa, agave, banana, coffee, vanilla, and sugar packet. Blend until smooth.
  4. In small bowl combine rice flour, baking powder and salt. Add to blender and pulse just until fully mixed.
  5. Stir in chocolate chips.
  6. Pour into greased pan (I used 9x9 inch pan)
  7. Bake for 30 minutes and enjoy :)

Tuesday, March 29, 2011

A Less Major Fail: Chocolate Chip Cookies with Garbanzo Bean Flour

What do garbanzo beans, carob, and Seinfeld all have in common? Chocolate chip cookies of course!

A few weeks ago my mom brought home garbanzo bean flour and I have been searching for a cookie recipe to use it in. My first experiment with garbanzo bean flour did not turn out well...it gave my carrot cookies (as seen in an earlier post) a bad aftertaste...awful. But I found a solution: Jessica Seinfeld's recipe for garbanzo chocolate chip cookies from her cookbook Deceptively Delicious. I haven't tried them, but rumor has it that they are delicious! (deceptively delicious, that is). If you want the recipe but don't want to buy the book, it is all over the Internet.


I did a little bit of substituting (as always). Her recipe actually calls for canned garbanzo beans, but I used the garbanzo bean flour instead, which gave it a peanuty taste. And I used steel cut oats (because that is all we had in the house) which aren't great for baking, but they still tasted yummy. And I ran out of chocolate chips so I used half chocolate chips and half carob chips (if you like carob, you can substitute all the chocolate chips for the carob chips. But with half and half, you can't really tell the difference between them). 

We also had vanilla agave nectar, which I used to supplement the vanilla extract and sugar.

So with  this new recipe in hand, I began to create my own recipe. I felt pretty confident about it, but I was still a little worried about using almond meal, knowing that it doesn't rise like normal flour. I thought using an extra egg would help but...well...the as the cookies spread, so did my disappointment.

Unfortunately these did not turn out as I had planned. Although they taste good, they are almost impossible to eat, and I've resorted to scooping them into a microwaveable bowl with a dollop of whipped cream. Spring Break is next week, so I will have more time to try this recipe again.

Sunday, March 27, 2011

Who doesn't love whipped cream?!

If you haven't noticed by now, I put whipped cream on ALL my baked goods. Why, you ask? Well, for starters, we are always well stocked in the whipped cream department. And why not? It's a sweet refreshing sugar-free topping! (And I also haven't found a sugar-free frosting yet, so this is a great alternative)

But let me clarify...I'm talking about homemade whipped cream. In my opinion, it is so much better than store-bought. And unfortunately...some people don't even know how to make whipped cream! So let me be the one to educate you on this important matter. 


All you need is two simple ingredients:
  • Heavy Cream
  • Vanilla Extract
And the directions are even simplier!
  1. Pour heavy cream in electric mixer and get ready...get set...whip!!!
  2. Add vanilla extract to taste
For chocolate whipped topping, just add cocoa powder.


Saturday, March 26, 2011

Homemade Granola with Coconut

Ok, I know that it looks like birdseed, but trust me! It's yummy. I adapted this recipe from the back of the Let's Do...Organic Coconut Flakes bag.

The birdseed look was due to the steel cut oats I used. Although it didn't affect the taste, I would definitely use a different type of oats next time.

The recipe called for 3/4 cup almonds, but since I already used almond flour, I decided to substitute it for nuts and dried fruit. I used a 3/4 cup of chopped walnuts, raisins, and chopped dried apricots.


 INGREDIENTS:
  • 3 cups rolled oats
  • 1/4 cup almond flour
  • 3/4 cup coconut flakes
  • 3/4 cup chopped nuts and dried fruit
  • 1/2 tsp cinnamon
  • 1/2 cup agave
  • 1/3 cup mashed banana
  • 1 tsp vanilla
DIRECTIONS
  1. Preheat oven to 300 degrees.
  2. Mix almond flour, oats, coconut, cinnamon, dried fruit, and nuts.
  3. Mix agave, banana, and vanilla.
  4. Combine; pour evenly onto ungreased baking sheet.
  5. Bake 30 minutes; stir and bake another 30 minutes.

 Perfect on top of yogurt or ice cream :) Enjoy!


Saturday, March 19, 2011

Banana Nut Bread with Yogurt

I'm just going to be honest. This banana bread is delicious. Like, really delicious. And it's pretty much guilt-free. Enough said.

Banana Nut Bread (adapted from Food.com)

INGREDIENTS
  • 1 1/3 cup rice flour (brown or white- see substitutions page)
  • 2/3 cup almond meal
  • 1 1/4 tsp baking powder
  • 1/2 tsp baking soda
  • 2/3 cup agave nectar
  • 1/3 cup plain yogurt
  • 4 egg whites
  • 2 tbs milk
  • 1 cup mashed bananas (about 2 bananas)
  • 1/4 cup chopped walnuts

DIRECTIONS
  1. Preheat oven to 350 degrees.
  2. In medium bowl combine rice flour, almond meal, baking powder and baking soda.
  3. In electric mixture, beat agave nectar and yogurt. Add egg whites, one at a time. Add milk.
  4. Slowly add flour mixture to agave and yogurt mixture. Slowly add mashed banana. Fold in walnuts.
  5. Spoon batter into greased pan (I used an 8x6x2-in pan). Bake for 50 minutes.
  6. Cool and top with whipped cream!

Enjoy :)

MAJOR FAIL: experimenting is not always as easy as it looks

Get the tissue box ready, I have a sad story for you...

So lately I've been pretty confident in my baking skills...dare I say overconfident. Silly me, I had this idea that I could invent, with no recipe book to lean on, my own recipe for sugar/flour free carrot cake with sugar free cream cheese frosting. And after my THIRD time trying to make these, I have finally realized that perhaps the world isn't ready for my original work. HOWEVER, I am a big fan of carrot cake, and with a little help from my friends at Food, I Love You, I am determined to make the perfect carrot cake AND the perfect sugar free cream cheese frosting.


My second try at making carrot cake muffins (the first aren't even worth mentioning) looked sooo good...and actually were ok...


it was the frosting that was bad. I think I've mentioned this before: NEVER try to substitute splenda (or any other sugar substitute) for powdered sugar...never ever. My poor cupcakes :(

 So I took a different approach to frosting and found a couple recipes that used sugar-free Jell-O pudding mix. Unfortunately, what I discovered is that Jello-O likes to hog the spotlight from all the other ingredients. It turned cream cheese frosting into vanilla Jell-O with the slightest hint of cream cheese. And for someone who doesn't like Jello-O pudding, this wasn't a good thing. (Although, now looking at this picture and seeing the "6 1/2 cup servings," I might've just used too much. Oopsies...)

And the cookies weren't too great either (yeah, I decided to switch to carrot cookies); I used rice flour and not enough sweetener which gave it a weird aftertaste.


Dont' worry, there is a point to this anecdote! As I keep trying to find a good cream cheese frosting recipe, I am going to work on making the perfect carrot cake cookie. Because...ta-da! New idea: carrot cake sandwich cookies with cream cheese center (isn't that a mouthful!)  


Sunday, March 6, 2011

Experimenting with Brown Rice Flour (Agave Mango Cupcakes)

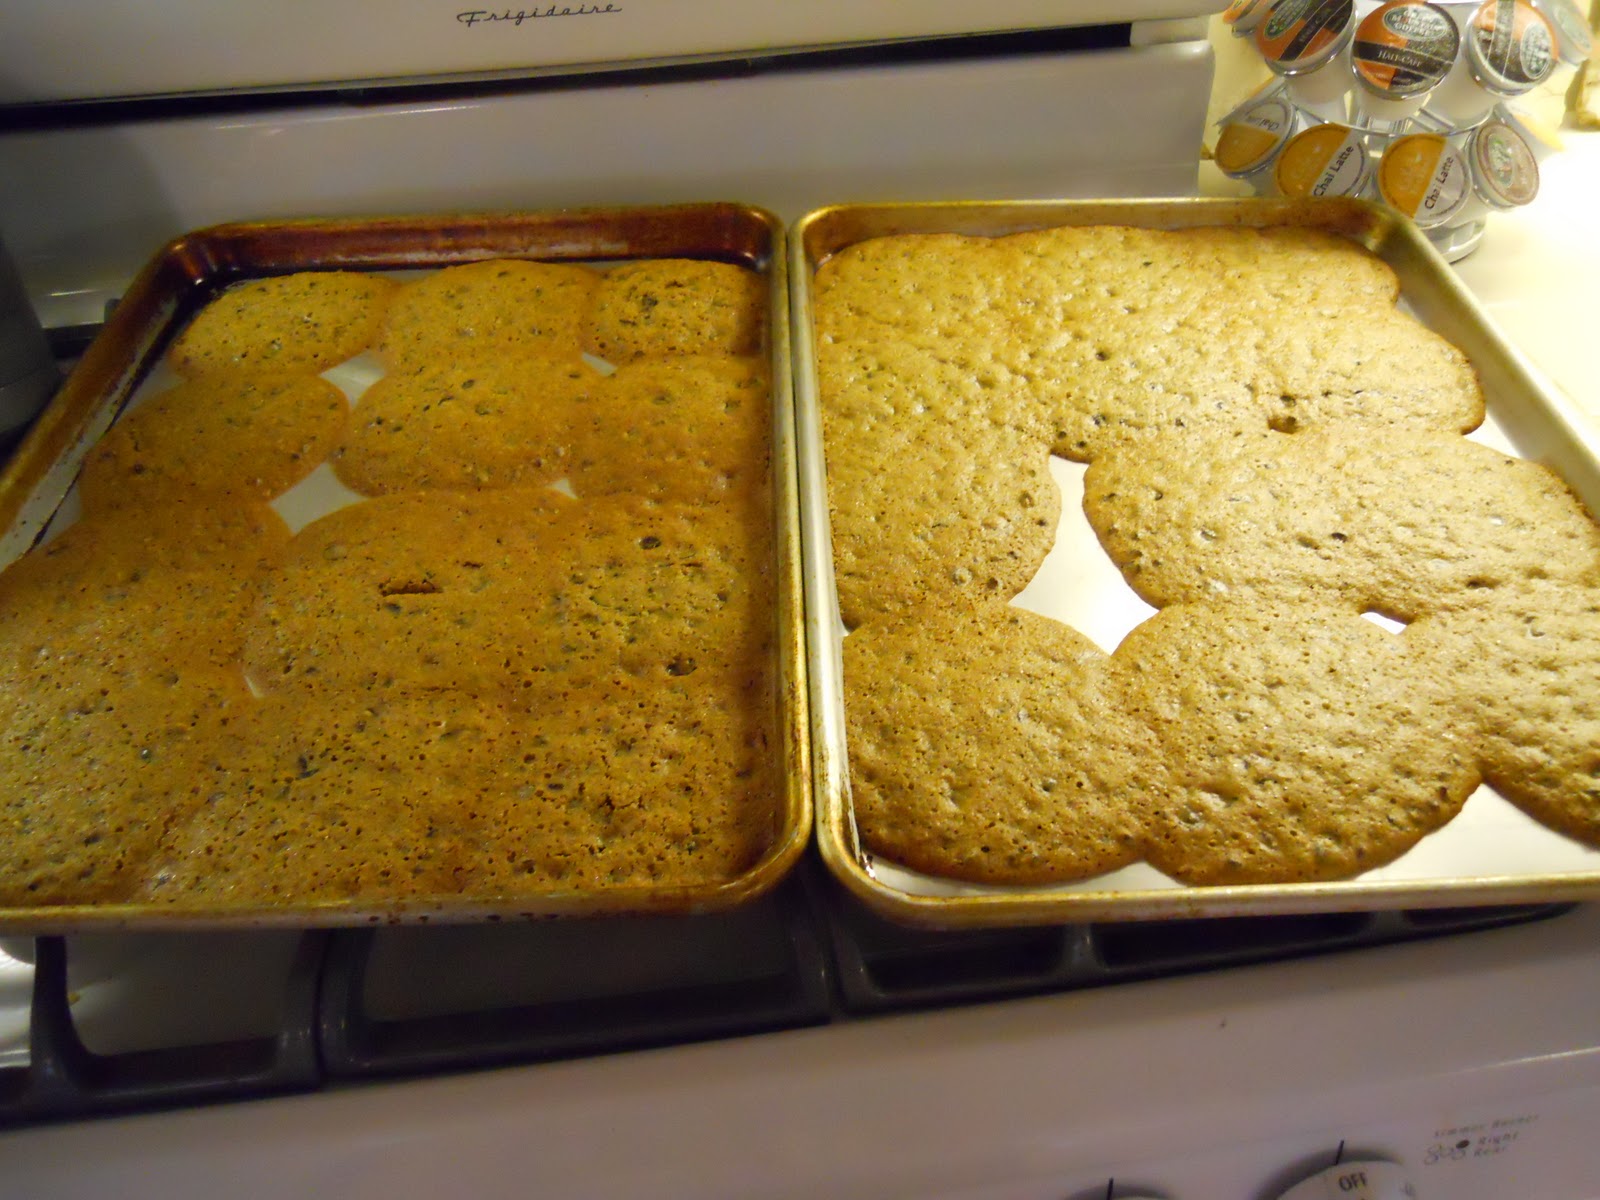
Today I had my first experience baking with brown rice flour, and I was pleasantly surprised. The benefit of using rice flour is that it is gluten free. It bakes just like flour so there are no confusing substitutions, and it has a good taste. I will be using it a lot more from now on! I think my mom picked this up for me, so I'm not quite sure where she got it, but I've seen this particular brand at Vons.

To test it, I decided to use a recipe I found for Honey Mango Cupcakes. Not your normal cupcakes, I know, but since we had mangoes in the house I decided to give it a try, and I'm really happy with how they turned out!

However, to keep them sugar free (and because of the fact that we didn't have any honey, but loads of agave), I used agave nectar instead.

 You only need 1 mango- half goes into the cupcake batter, and about a quarter of it is used for the icing. To puree it, I just threw mango slices into the Cuisninart and let it spin. Although tasting the cupcakes afterward, I think I would have left them in there for a shorter amount of time, so that there were mango chunks in the batter. But it doesn't really matter, they were still good :)
The recipe I used called for buttermilk, which I didn't have, so I substituted! (I know, big surprise). I used Kefir instead, which is basically like a liquid yogurt. I did a little research on it, too, and it actually has a lot of health benefits. I will put more information about it on my substitutions page. I think you can find it at almost any market, but the one I used was from Trader Joe's.

So are you finally ready for the recipe?? Here it is:
Agave Mango Cupcakes with "Icing" (adapted from The National Honey Board)

INGREDIENTS
  • 2 cups Brown Rice Flour (white rice flour would work too)
  • 1/2 teaspoon Baking Soda
  • 1/2 teaspoon Baking Powder
  • 1/2 teaspoon Sea Salt
  • 1/2 cup Ripe Mango, pureed
  • Zest and juice of One Lime
  • 1/4 cup Kefir
  • 1/2 cup Butter, softened
  • 1/2 cup Agave Nectar
  • 2 Large Eggs
DIRECTIONS
  1. Preheat the oven to 350 degrees. Sift together brown rice flour, baking soda, baking powder, and sea salt; set aside.
  2. In a small bowl, combine the mango puree, lime zest and juice, and kefir; set aside.
  3. In a mixing bowl, cream butter. Add agave nectar. Add eggs, one at a time.
  4. Slowly add half of the dry ingredients to the butter mixture until just combined. With the mixer on low, add the mango mixture. Add the remaining dry ingredients.
  5. Fill muffin tins 2/3 full. Bake 27 minutes, or until a toothpick inserted in the center of the cupcake comes out clean.
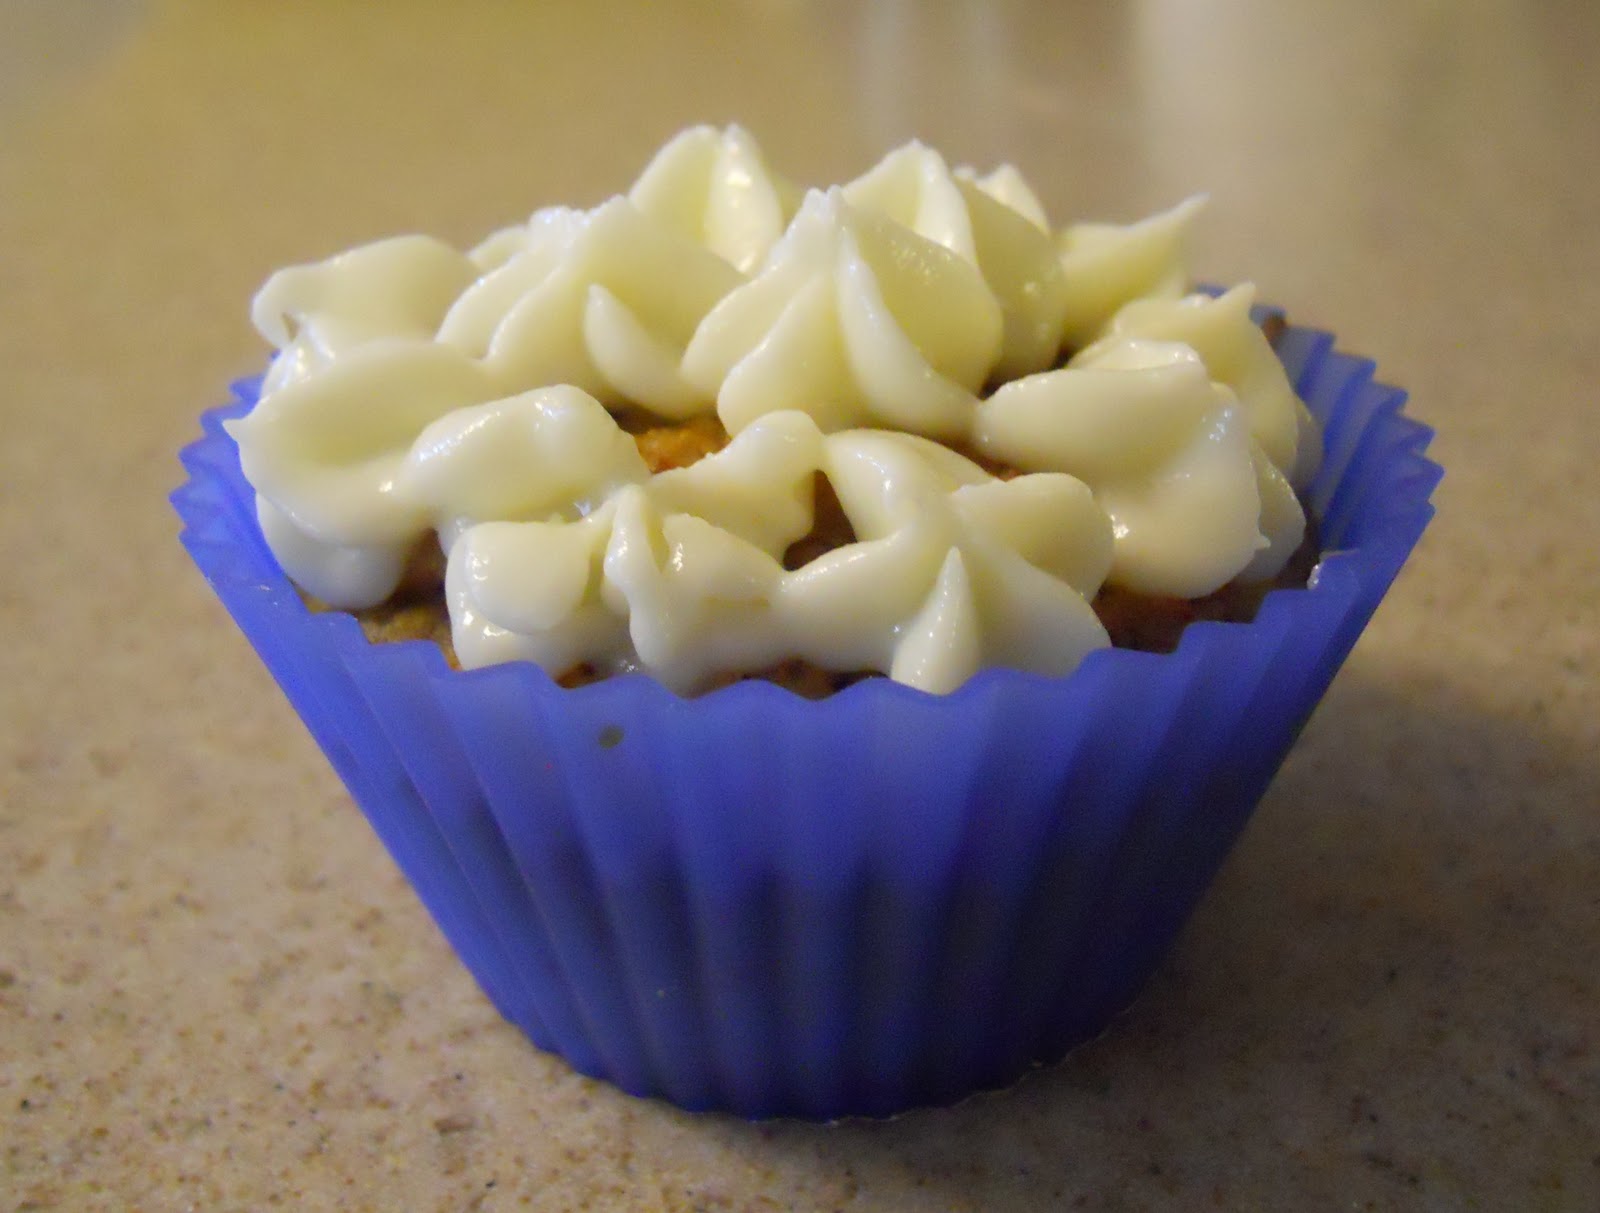
  6. Cool for about ten minutes and spread the icing evenly over the cupcakes. Makes 14 cupcakes.
Agave Mango "Icing"
I learned a very important lesson: NEVER use Splenda to make frosting. It does not substitute for powdered sugar; the frosting comes out more like pudding and has a bad aftertaste. So, I had to improvise and come up with my own topping. My experimenting turned out quite well, and it gives it that extra fruity flavor that the cupcakes are lacking.
INGREDIENTS
  • 1/4 cup Mango, Pureed
  • 1 tbs water
  • 1/2 packet Splenda
  • 1 tsp Agave Nectar
DIRECTIONS
  1. Combine ingredients in mixing bowl.
  2. Use brush to spread the topping evenly over cupcakes.

Saturday, February 26, 2011

Upside-Down Pear Cake (sugar-free and flour-less!)

It's my second day with my new blog and I already have something new! Now, I know that it's called the Quirky Cookie, and I'm already straying away from the cookies, but don't worry, they'll be back!

In the meantime, I have an experimental recipe for you to try. I've been making upside-down plum cakes for awhile, and they are a big hit, but I came across a problem this morning: we didn't have any plums! So rather than getting off the couch and going to the market, I did what I do best: substitute!

And I also mixed it up a little bit to make it a bit tastier, so I hope you like it!

UPSIDE-DOWN PEAR CAKE (or plum!)
So, I have a feeling, for those of you living life without the joys of a springform pan, it is just as easy to use a normal pan, and pour the batter in first with the pears on top. BUT that takes away all the fun, because then the final product won't be a surprise!


And for those who haven't tried pear sauce, it's yummy! I found it at Trader Joe's next to the applesauce. Oh, and don't forget my FAVORITE secret ingredient :)

INGREDIENTS
  • 3-4 Pears (or if trying the plum recipe, I used 8 small plums)
  • 1/2 cup Agave Nectar
  • 6 Tbs Butter
  • 3 Eggs
  • 1/2 cup Milk
  • 1 4oz container of Pear Sauce (or apple sauce works well too)
  • 1 1/2 tsp Vanilla Extract
  • 1/2 cup Oats
  • 3/4 cup Almond Meal
  • 1/4 tsp Salt
  • 1 1/2 tsp Baking Powder
DIRECTIONS
  1. Preheat oven to 350 degrees. Layer the inside of a springform pan with foil.
  2. Cut thin slices of the pears and, in a large bowl, mix with agave nectar.
  3. Arrange Pear slices in concentric circles in the springform pan, overlapping slightly.
  4. In electric mixer, beat butter until smooth. Add eggs, one at a time. Add milk, pear sauce, and vanilla extract.
  5. In separate bowl, combine dry ingredients. Slowly add to butter mixture.
  6. Pour over pears evenly.
  7. Bake for 45 minutes. Cool for 10 minutes and loosen the edge of cake from foil.
  8. Flip over and enjoy!